Bring Your Own Sheet
If you prefer to use your own Google Sheet, you can do so by following the steps below. Keep in mind with this method you loose access to the following features:
Sales to purchase matching (dashboard tool)Built in Google App Script automations
You will continue to have access to the following features:
Email hubBarcode scannerReceipt scannerStockX Bulk Shipping DiscountSales to purchase matching (manual confirmation via webhooks)
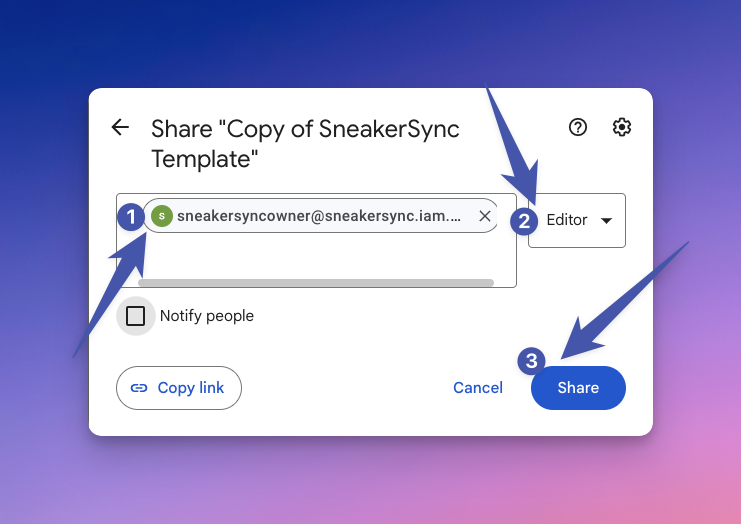
Step 1: Give Editor Access to Your Sheet
Share your sheet with sneakersyncowner@sneakersync.iam.gserviceaccount.com and grant Editor permissions.

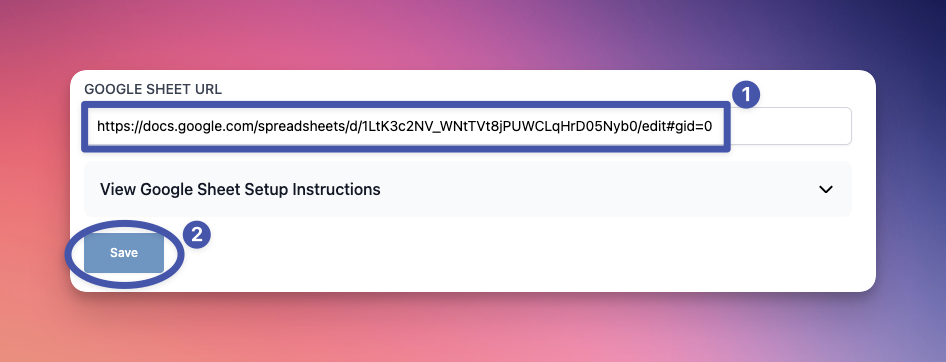
Step 2: Add Your Sheet URL to SneakerSync
Copy the URL of your Google Sheet. You can find this in the browser address bar. Paste this URL into the SneakerSync dashboard where it says Google Sheet URL.
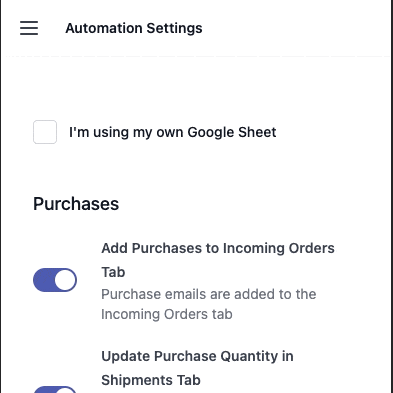
Step 3: Update Automation Settings
Go to the Automation Settings tab and check the box that says I'm using my own Google Sheet
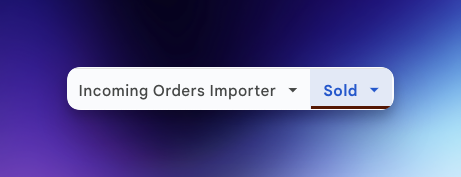
Step 4: Add Tabs to your Sheets
Add the following tabs to your sheet:
Incoming Orders Importer: This acts as a staging area for email hub entries, barcode scans, and receipt scans. Purchases, shipments, deliveries all appear here.Sold: Sales from the email hub and barcode scanner will be added to this tab.
The column headers for each of these tabs should match the column headers in the SneakerSync template sheet. Feel free to re arrange columns or remove columns you don't need, but do not change the spelling of the column headers.
Refer to the SneakerSync template sheet below to view the column headers: